Introduction
Modernity has spawned some of the most interesting variants of America’s favorite rifle. With ever evolving purposes and more manufacturing technologies it should come as no surprise that the AR market is so deep. Dark Storm Industries (DSI) has been in the business for over a decade, both as a retailer of fine products and manufacturing their own. After relocating to gun friendly Florida, their manufacturing went into overdrive. DSI offers everything from compliant state firearms for their former home, to bolt-action and semi-auto high performance AR-style rifles. I was offered a look at one of their most recent products, and today I share that experience with you. Our subject is the Dark Storm Industries DS-25 Modern Fighting Rifle, a small framed SBR chambered in 6.5 Creedmoor.

The DS-25 MFR
As a civilian, I’ve never had to actually fight with a rifle. But as a rabid firearms enthusiast, I have spent more time than most behind rifles. So I was very eager to see what the DS-25 offered over what I was used to. Since this rifle was designed as a rifle meant for defensive and duty use, that is the perspective I will approach it from. It could also be easily moved into other roles as well, which we may touch on.

The DS-25 packs many features into its compact and lightweight frame. DSI not only built the rifle to be lean and mean, but apparently wanted to make it a bit posh at the same time. The receiver set are machined with robust facets where they are needed, and thinned out where weight can be saved. As an novice engineering student, I have been impressed with many of the small yet significant built-in innovations. Their M-Lok Multi-Lithic™ handguard is married to the upper receiver via index pins and fasteners. It also connects through the front take-down pin locking the whole upper assembly in with the lower. Take-down pins are extended for easy cleaning and maintenance.

The upper receiver is also packed with little features. Starting with a 14.5-inch hand-lapped 416R stainless steel barrel, like something you’d see in a match rifle. The barrel is free-floated from the handguard, with no contact of the barrel nut. Made from an “aerospace alloy”, the barrel nut itself is made to greatly increase heat dissipation.

Also on the upper receiver, you will find a traditional forward assist. I am guessing this was included because of some kind of contract requirement. Most people I talk to dislike them and see them as superfluous. The only thing I have ever experienced with them is wedging a cartridge into the chamber that should have been pulled out not “assisted” into a hard jam.

DSI’s ATACH charging handle uses dual locking claws to prevent unwanted reciprocation. And the jaws lock against replaceable steel pins incorporated into the pic rail. With an extra shelf built-in, the tight-fitting charging handle is also built to keep gas from getting in your face when suppressed. It even has a vented buffer tube to allow water to drain out for you d*ck hunters out there.
Specifications
| Precision Matched Receiver Set | • Machined from US Produced 7075 T651 Aluminum • Mil-Spec Type III Class 2 Hardcoat Anodized Finish • Cerakote H-Series (Flat Dark Earth) |
| Billet Lower Receiver | • Premium investment‑cast flat shoe DLC coated two‑stage trigger (3.5lb pull) • Ambidextrous Magazine Release • Ambidextrous 90° Safety Selector w/ Billet Arms • Ambidextrous Bolt Catch and Release • Threaded Bolt Catch Screw • Extended Takedown and Pivot Pins |
| Billet Upper Receiver | • Multi-Lithic™ Handguard Attachment with Twin Index Pins • Chainlink™ Locks the Handguard to the Upper and Lower via the Pivot Pin • ATACH™ Ambi Charging Handle with Duo-Lock™ • Dual Serviceable Steel Pin for Charging Handle Retention • Mil-Spec Pinned (not glued) Forward Assist • Threaded Forward Assist Retaining Screw • Mil-Spec Dry Film Lubricant Applied to Bore • Additional Rear Pic Rail Slot |
| DSI DS-25 Bolt Carrier Group | • DLC Nickel Chrome TB42 Bolt Carrier Group per MIL-PRF-32711 • 8620AQ Bolt Carrier (Diamond‑Honed Bore) • 9310AQ Dual Ejector Enhanced Profile Bolt for .308/6.5C • 4130 Gas Key (Grade 8+ Torx‑staked) • 8740 Steel Ground Chrome Firing Pin • SpringCo XP 5‑Coil Extractor Spring |
| DSI 14.5″ Medium Taper Profile Barrel | • 416R Stainless Steel, Lead Lapped • 5R Button‑rifled; Twist: 1:7 or 1:8 • Mid‑length Gas System with Pinned Gas Block • Mil-Spec Hard Chrome Bore and Chamber • Optional Pin/Weld for Flash Hider |
| DSI Extended Buffer System | • Extended 7075 7-Position Buffer Tube with Drain and Vent Holes • Electropolished 17‑7 Stainless Extended 40 Coil Buffer Spring • Neoprene‑Dampened 3.0oz Carbine Buffer with High Durometer Bump‑Stop • Dry Film Lubricant in Tube Bore • Dual‑staked QD end plate & castle nut |
| Included Accessories | • 20‑round Magpul MCT magazine • Keyed cable lock |
| Dimensions | • Length (stock collapsed) • Weight: 6.9 lbs (w/ Mag) |

Rifle Setup
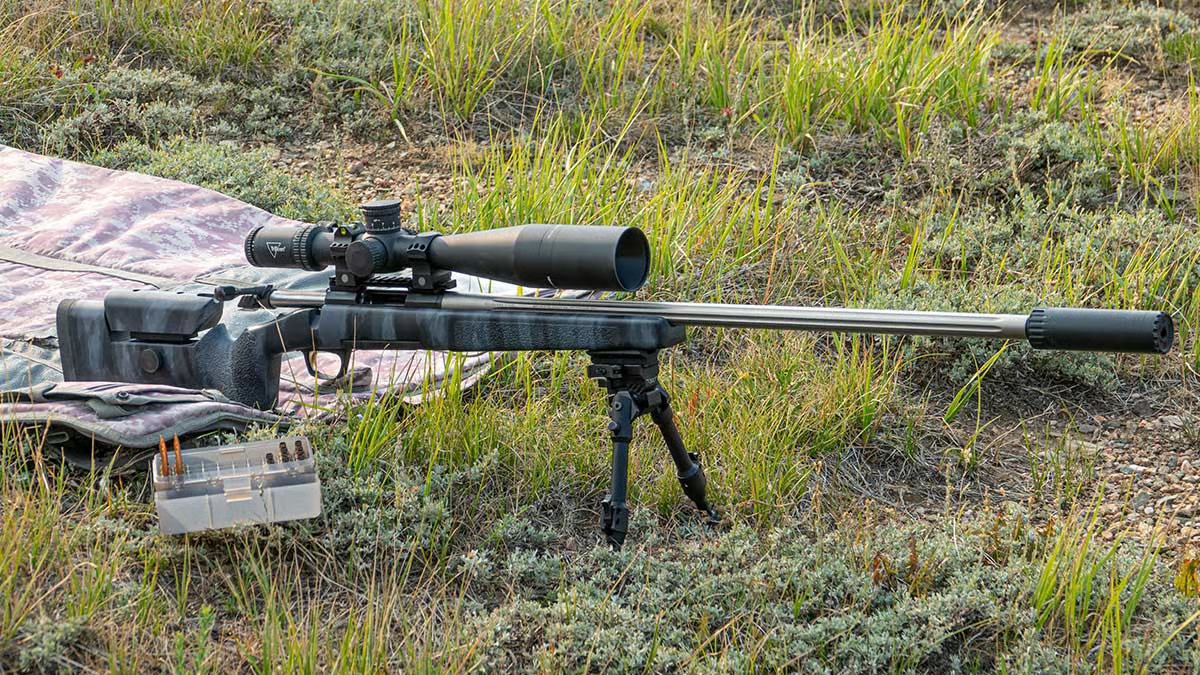
I decided to try several different setups with this rifle, as I expect it to shine in any of them. My first setup would be for all out accuracy, with a mid-power rifle scope and bipod to see what the rifle’s accuracy potential is. The 14.5-inch chrome-lined barrel is made to shoot well, and with some match grade 6.5 Creedmoor ammo I could expect to get the best of it.
I am a big fan of low power variable optics (LPVO), and would for sure install my Primary Arms PLXc 1-8 on the rifle. This would be great for short and mid-range shooting where a rifle like this should shine.

Lastly I would also use a micro prism/magnifier combo as I expect many folks out there might consider shooting it that way as well. For that I selected the Vector Optics Paragon line, an affordable brand that has performed well for me.

Suppressed
You can buy this rifle as an SBR, or you can order it with a pinned and welded muzzle device from either Huxwrx or SiCo. I used an ASR mount to use my Omega 36M on this rifle, and used it for most of the shooting. There was a bit of extra blowback when suppressed, I believe the above picture caught the very worst of it. To be fair to the rifle, I hardly noticed the gas at all while shooting.

Just for some variability, I also used my new CMMG Zeroed 36 suppressor. It also did a fine job at making the MFR pleasant to shoot. It is a little shorter than the Omega, making the overall package more compact.

On the Range
My initial impressions from the DS-25 were that it recoils more than expected. It feels like an AR15 in your hands, so its easy to forget you are shooting full-house Creedmoor loads from this small rifle.
In the Field

Accuracy
Testing accuracy from this rifle varied depending on which sighting system was in use. With the 1x Micro prism, and together with its 3x magnifier I found accuracy to be minute of dude out to some pretty reasonable distances. Hitting a 10-inch target was doable out to three or four-hundred yards depending on how stable you could remain.

To get a realistic accuracy test I switched over to rifle scopes. Both the PLXc 1-8 and the Mueller TacHunter 6-24 gave much more precise shots. Shooting groups right around one MOA at 100 yards without trying particularly hard. Most of my shooting was done using one suppressor or another which also might help calm the rifle down.

I kept forgetting that I was shooting an SBR here, with a can in place it felt more like a full sized rifle. But accuracy was pretty good in my opinion, and the velocity didn’t seem to suffer as much as expected. Typical 130 and 140 grain loads were running around 2550 fps which is pretty good compared to a typical 14-inch AR-15. Even if it was shooting 77-grain ammo at 27-2800, the MFR’s Creedmoor barrel has a hell of a lot more lead in its pencil.
Reliability
I only had a few issues with this rifle while testing, and it seemed to be related to ammunition. On a couple shots it seemed as though there wasn’t enough momentum to get the next round into battery. Again, this could be a little bit of break-in, or perhaps completely related to the ammunition. It wasn’t a recurring event after the first range trip, but I figured it was worth mentioning.

Of the many little extras on this rifle, dual staking of important parts are part of increasing reliability. The DLC bolt-carrier has dual staked gas key screws, as does the castle nut on the buffer tube.
Ergonomics
I must start by saying this, I have had a few large frame AR10 rifles. And you can have them SOB’s, way to heavy and long. I can’t imagine having to use one for any kind of defensive or quick shooting, when there are so many better options like the MFR. This rifle is quick to maneuver and get on target, even with a suppressor.

The grip angle is great, and the narrow handguard is easy to manhandle. Though it might be nice to add a down-grip somewhere. Adjusting the length of pull is easy of course with the Magpul stock.
Interacting with the controls of the rifle feels excellent. One of my favorite additions to AR lower receivers is the right side bolt-release. I have them on several of my rifles, and this one also has the feature. It makes reloads faster, and better control for unloading a hot rifle.

The safety is ok, it wouldn’t hurt my feelings to put a 45-degree safety instead. But the trigger is fantastic, despite being a touch gritty at first, I think it just needed breaking in. Now it feels fantastic for an action rifle. And the dual claw locking charging handle is very robust and much smoother than many of the charging handles I’ve used.
Value
Dark Storm has packed this rifle with a bunch of small and large features that greatly increase it’s value for those looking. That is a thin line to walk, as AR people can’t wait to change out parts on a gun once purchased. And many folks are not going to want to pay the price for so many little parts and features that they might change out anyways. That said, this rifle is pretty immaculate. It has just about everything I would want a rifle like this to have.

Looking at other 6.5 Creedmoor AR rifles that are comparable, the price is not that different. Peers for the MFR come from companies like Daniel Defense, JP, and Christensen Arms. But to be honest, unless they are small frame rifles I wouldn’t even consider any of those over this one. With an MSRP of $2995 it is certainly not for the casual shooter, but more for professional and dedicated marksmen.
Pros and Cons
I can start out by saying this is a very nice rifle, sure you could maybe upgrade the Magpul parts if you’re that kinda guy. But overall this rifle is very well put together and finished. With so many little niceties added up, it stands out. Everything from lightening cuts down to fasteners and finishes.

| +Lightweight | -Not inexpensive |
| +Accurate match grade barrel | -The one minor short-stroking thing I mentioned |
| +Ambidextrous controls | -Forward assist |
| +High Quality parts (inside and out) | |
| +Excellent suppressor host | |
| +Available as SBR or pinned and welded MD | |
| +Handbuilt and tested |
My Verdict
I really like this rifle, its a great blend of high quality and rich in features. Its the kind of rifle I would love to have after the inevitable collapse of society into a apocalyptic hellscape. At least it would be if I had enough Creedmoor ammo. It is accurate, compact and hard hitting. Allowing mobility in tight spaces without weighing a ton. And still bringing the downrange power and accuracy that the Creedmoor is known for.