Tag Archives: precision rifle

Seekins Precision, Seekins, Havak, PH#, havak ph3, 7 PRC, 7mm PRC, hunting, precision rifle, steiner, h6xi, silencerco, scythe, rifle supported on rocks with mountains in background,

Seekins Precision Havak PH3 7PRC Every Elk Hunter’s Dream

Preface

Seekins Precision has been a well known name in the precision rifle community for a long time. From small beginnings, Seekins has built a massive name for themselves among precision shooters, law enforcement/military and the hunting public. Today we will be taking a look at one of Seekins popular rifle models marketed towards hunters; the Seekins Havak PH3. This model happens to be chambered in 7mm PRC, though it is available in a variety of others.

the Havak PH3 in its happy place

The Havak is by no means an entry level rifle, more likely to be purchased by dedicated hunters who take their shooting very seriously. Furthermore, the caliber change ability of the PH3 Action allows the user to incorporate additional calibers to the same rifle. All this to say the Havak is worth sticking around to the end to see what makes it so useful to you as a hunter.

The Seekins Havak PH3

Seekins released the Havak in 2017, as a production premium hunting rifle. All kinds of custom rifle features were built into the rifle, particularly helical fluting, precise bedding process and quality triggers.

the PH3 came in a simple plastic case

Later in 2025 the PH3 model replaced the previous model. The new PH3 incorporated a sixty-degree bolt-throw due to its six-lug bolt design. Additionally, the PH3 added Seekins own switch-barrel system.

the PH3 Action, a fantastic design

PH3 Action

Its bolt can be completely disassembled without tools, which also allows you to change the bolt-head for different sized cartridges. The barrel can also be changed by loosening a tension screw on the side of the action, then threading the barrel out of the action. Reversing the process with a different barrel and bolt-head render the Havak PH3 a whole different rifle. More on this later.

the disassembled PH3 bolt, using no tools

Unlike the first generation of the Havak, the PH3 does not share the Remington 700 footprint. But it does use the same style triggers which is a nice touch. The bolt-release is opposite the bolt-handle on the left side of the action, and also acts as a key to keep the bolt from rotating unless in battery.

lots of lightening cuts, and of course the Trigger Tech

Chassis

The Havak uses a mini chassis to perfectly mate the action to the stock, made from a machined piece of aluminum incorporated to the stock itself. This model comes with adjustable comb, and features M-Lok rails in the forend to attach your favorite accessories.

here you can see the M-Lok center rail, and QD cup locations

The comb-height can be adjusted on the fly, which is a nice feature. As are the four integrated QD sling cups to attach your favorite sling. For scope mounting, the Havak uses a built-in 20-MOA canted scope base, which is ideal for long-range shooting.

Specifications

Caliber7mm PRC
Barrel Length22 inches
Barrel Twist Rate1:8″
Barrel MaterialFluted & threaded stainless steel
Muzzle Thread5/8×24 (includes muzzle brake)
Action Type3-lug bolt with a 60-degree throw
Rifle WeightApproximately 7.8 lbs
Overall Length42 inches
Stock MaterialCarbon composite with mini chassis
Stock AdjustmentsAdjustable cheek riser
Trigger TypeAdjustable TriggerTech Primary
Magazine SystemDetachable box magazine (3-round capacity)
Optic MountIntegrated 20 MOA Picatinny rail
Accessory MountFull-length M-LOK rail on fore-end
Special FeaturesQuick Change Barrel System

Unboxing and Setup

As I opened the box I was pleased to see the Havak came in a simple plastic hard case. Nothing fancy, but nice enough to throw the gun in the bed of the truck. Inside the case I found the rifle and a fired cartridge in a small plastic tube, this is handy for those looking to handload.

PH3 Action and Barrel

After installing the bolt, and ran it back and forth a few times. It was smooth and easy to lift due to its three-lug bolt. There was a lower than anticipated amount of friction when closing and opening the bolt, which I expect will make cycling cartridges more fluid. The Trigger Tech as usual feels fantastic, with a clean break and a two position safety.

At the top of the action you can see the built-in picatinny rail. It is interrupted in the middle, and also has machined out the center of the picatinny section. This is an obvious weight savings technique, and it looks very well done.

The bolt-release is easily actuated to remove the bolt from the rear of the action. Removing the barrel is a little more intense of an operation that I will go into a little later. Helical flutes adorn the 22-inch barrel for a handsome look, and at the front you’ll find a radial muzzle brake mounted on 5/8-24 threads.

the 5/8-24 threaded muzzle and radial muzzle brake

Havak PH3 Stock

The stock was also impressive, with its built-in mini chassis and M-Lok rail. The precisely machined mini chassis perfectly fits the bottom of the action, and the stock closely fits the entire barreled action. On the bottom of the stock, there is a full-length forearm M-Lok rail that sits in a groove down the forend centerline. The aluminum magazine well is sandwiched under the rail, and the mini chassis.

The Amend 2 polymer magazine holds 3-rounds, and it fits securely in the Seekins magwell. The mag release is inside the triggerguard, and does require a fair amount of pressing to release the magazine.

here you can see the precise fitting of the action and mini chassis

Adjusting the comb-height of the Havak stock was surprisingly easy. I thought there would be a thumb-wheel or something to tighten. But there is a simple push-button that when depressed, allows you to raise or lower the comb. I like that the front end of the adjustable comb has a void to allow removing the bolt regardless of comb-height. There is a soft rubber recoil pad at the rear which works great to reduce the recoil of this magnum rifle with its light weight.

the comb-height can be adjusted by pushing the button in, and raising or lowering the comb. I love the cutout for the bolt, so you don’t have to change the comb-height to remove the bolt from the action

Setup

For my initial tests, I decided to mount some quality accessories. First off was the brand new Steiner H6Xi 2-12×42, a scope with a focus on hunters and their needs. With its 30MM tube and single rotation elevation turret, it would give more than enough travel for some long-range elk hunting later this year. I mounted the H6Xi in a set of matching 30mm Steiner rings, with just enough room to clear the rifle features.

Under the stock I put a Magpul M-Lok sling mount up front so that I could install a Harris bipod. A simple sling could also be added using the various QD cups on the stock of the Havak. Lastly I would for sure run the rifle suppressed, first with the SilencerCo Scythe Ti. And later using the SilencerCo Omega 36M just to get a little variation.

Initial Shots

First shots from the PH3 were done at a rifle range, to get it zeroed and baseline accuracy. For that I fired a couple different loads; some 162 ELDM handloads, as well as some 180gr Hornady Match and some Barnes VOR-TX 160gr ammunition.

firing some of the initial shots using the Anechoic Anechox 35 suppressor

I boresighted the scope before settling down behind the rifle on a bench. A couple shots was all it took to correct point of impact, and get a couple groups on paper. After which I zeroed the turrets of the little Steiner so it would be ready for bigger country.

As the morning went on, I shot additional rounds to evaluate how the PH3 functions and to familiarize myself with it.

Field Testing the Seekins Havak PH3

Later on a another day we would shoot the PH3 in the Rocky Mountains where it was meant to be. Bringing additional ammunition sources to see it the Havak has a preference for them. Here in the 10k density altitude, the 7 PRC is a monster of a cartridge. And up here is exactly the kind of place it will be used this fall during hunting season. With additional shooters to get behind the Seekins, we’d be able to generate additional feedback on the PH3.

shooting the Havak supported by my Two Vets tripod

Accuracy

Seekins is known for their precision rifles, and that is where I expected the PH3 to excel. It was a relief to see how quick the rifle was to group well. And with additional shooting it seemed to tighten up even more. It also showed a preference for Hornady’s Precision Hunter 175 ELDX ammunition, printing 3-shot groups under .5 MOA. (albeit 200FPS slower than the box said 🤥)

a couple typical groups from my first range trip

Shootability

The PH3 action is outstanding. The short bolt-lift and smooth throw make it fast and nearly automated. Muscle memory runs the operation on the back-burner while you focus on the target and firing solution.

The one thing that stood out to me about the PH3 action was it seems to have significantly lower friction when opening the bolt after firing. Lower than what I’m used to anyways, which was a very refreshing sensation. The Trigger Tech was immaculate as always, making clean shots every time.

Ergonomics

Resting on the stock of the Havak PH3 was quiet comfortable. I love the adjustable comb, allowing us to get a perfect sight picture through the scope. The angle of the grip feels very natural and gives a perfect angle for trigger engagement. Every thing feels in the right spot and functions just how you would like it to. But there is one thing, that I must give a demerit for on this rifle. The magazine release feels significantly stiffer than it need be. If it was an outside the trigger-guard type, I’d be okay with it. But being an inside the trigger guard, it requires more effort than I’d like. I found it challenging to operate without breaking shooting position significantly. This did give me the impression that reloading magazines hastily might be a challenge.

the Steiner H6Xi 2-12 was a perfect fit for the lightweight hunting rifle

It’s fair I suppose to assume Seekins designed it this way to avoid magazines from getting inadvertently released while hiking down some God-awful canyon. And for a hunting rifle I would favor too hard to remove over too easy, for that very reason. Its not a huge deal, but one I figured deserves mentioning.

Reliability

Staying on the magazine topic; we had zero malfunctions with the polymer Amend 2 magazine. I appreciate how compact the magazine is, and its slippery polymer lips that feed flawlessly. But the magazine did feel a tiny bit petite, like it could be broken easier than I’d like.

Feeding cartridges was all but flawless, a couple times I noticed someone’s first shots on the rifle it didn’t feed but only because they hadn’t fully seated the magazine. Extraction and ejection are smooth and predictable.

even with all the added accessories the PH3 was still managable

The stiff stock of the Havak PH3 kept the rifle reliably accurate, even as the barrel heated up some. Shots didn’t wander from point of aim. It was a great performance, crossing all my t’s and dotting i’s.

Value

I mentioned at the top, I don’t feel like the Havak is an entry level rifle. But if you can afford it as your first hunting rifle, you’ll likely never need another. Street prices for the Havak hover between $1700 and $1900, which is not insignificant. But when compared to other big name custom shop production rifles, it is still quite reasonable.

I also shot the Havak PH3 with the SilencerCo Scythe, you can read more about that here

And with the Seekins name on it, you can trust they will take care of the product for life. I’ve dealt with some of the people at Seekins and they have always been informative and honest. Thats the kind of company that deserves your investment, and speaking of value, let us not forget the next topic.

Modular Seekins Switch-barrel System

This feature deserves it’s own section. Seekins has been making switch-barrel options for some time, you may have seen it in my review of the Seekins Havak HIT. The design is simple and reliable; barrels thread into the face of the action by hand, and are clamped secure using a single cross-bolt. This allows the user to remove their own barrel, and change it out to another should they choose. Additionally Seekins open sources their barrel design allowing you to have your local gunsmith cut you a custom barrel for your Seekins rifle.

here you can see the barrel clamp that keeps the barrel secure between swaps

If you find yourself changing to a smaller cartridge, you can swap out the bolt head to a different one by disassembling the bolt. This can be done by hand, no tools required. The system allows you to completely convert your Havak from the 7 PRC shown here to something like a 6.5 Creedmoor should you choose. All this done by you, at home, no special tools required (maybe a torque wrench if your’e a stickler). As a bit of a multi-caliber rifle guy myself, that is a value that is hard to put a price on.

Pros and Cons

Smooth reliable ActionThe Magazine thing I mentioned
Built-in Picatinny Scope Rail
Lightweight Design and Balance
Great Accuracy out of the box
Barrel/Caliber Change Option
Adjustable Stock
Built-in Mini Chassis
Excellent Trigger
M-Lok Forend
QD Cups where you want them
Threaded Muzzle and Brake
Sexy AF

Conclusion

I was confident that the Seekins would be a solid buy, not just because of my past experiences with Seekins rifles but because they have built a good reputation in the market. I am glad this rifle stood up to my expectations, and I look forward to seeing it laying against the bloodied side of our prey later this year. The Seekins Havak PH3 offers an accurate and reliable rifle that will standup for life, and accompany you into the dark and damp parts of the forest. Its the kind of rifle that will ride on your shoulder for weeks at a time, and make the perfect shot when it matters. I love rifles like that, and if you find yourself looking for one too, give the Havak an honest look.

-CBM

Check out the Seekins Havak HIT rifle, since you’re already here.

The Ruger Precision Rifle 6.5 Creedmoor

Introduction

The Ruger Precision rifle 6.5 Creedmoor took the precision rifle world for quite a ride when it first came out. Ruger made an excellent move by introducing an affordable rifle into an arena that was dominated by expensive custom-built rifles and actual sniper rifles. And in another stroke of genius they managed to make a rifle that appealed to the AR-15 crowd at the same time, which brought even more customers into their fold.
Ruger Precision rifle 6.5 creedmoor

The RPR

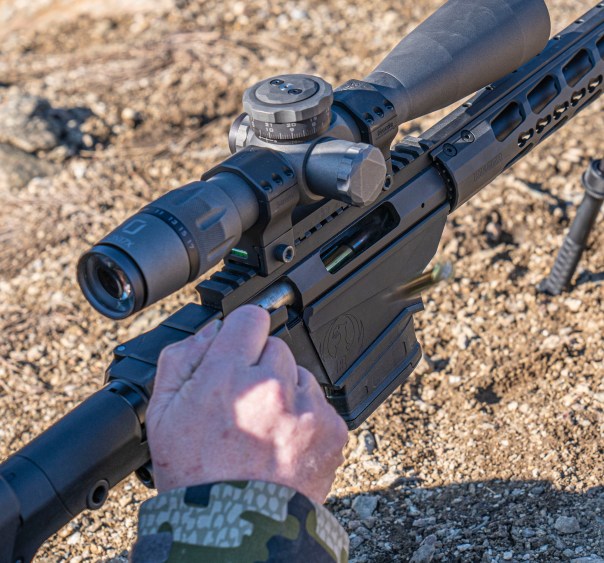
The Ruger Precision Rifle utilizes a bolt action receiver that is built into a chassis. It is fed by SR-25 pattern 308 sized P-mags for the 308, 6mm, and 6.5 chambered rifles. This rifle seems to almost clone the aesthetics of the extremely popular AR 15. Using the same pistol grip, and similar operation for the safety. Today’s test model also includes a folding butt stock for shortening the footprint of the rifle when transporting.

A twenty-four inch hammer forged barrel uses 5R rifling which if you ask the internet is the only good kind of rifling.  Long-range shooters prefer things like the one-in-eight twist barrel as it is ideal for launching the heavy for caliber bullets.  Weighing in at ten and a half pounds, the rifle is about forty-five inches long unless you fold it, in which case it is thirty-five inches long.

Check out my review of the Ruger RPR .22LR as well

Try It

Having been one of those in the community with a preference for the custom built rifle, it took me some time to actually give the Ruger a try. To be honest I did look down at it a bit, perhaps like many others I was angry that it shot just as good as rifles that cost twice as much or more.

But it didn’t take long for the RPR to prove its worth to those in the community, and now a days its common to see them shooting at top PRS events. I shot in the Hornady Precision Rifle Challenge this past summer. There we saw several RPR’s including Doug Koenig who did extremely well shooting with significantly more expensive competitors, taking home the top Production Rifle trophy.
Ruger Precision Rifle 6.5 Creedmoor
After all this time I figured it was time for me to open up to the Ruger, so I took the opportunity when it came. Opening up the box, I found the all black rifle complete with a magazine, bipod and a few other items. It took a few minutes to familiarize myself with the rifle, and get a feel for the controls and such. For me there are couple things that stand out when first handling a rifle, the first one is throwing the bolt. Quickly I shouldered the rifle and ran the bolt a few times, you can tell a lot about a rifle by the feel of the bolt-throw.

More Ruger Precision Rifle features

Bolt manipulation of the Ruger Precision Rifle was smooth and had a positive lockup feel when closed into battery. You could also feel a metal on plastic sensation a little bit which I assumed to be the piece at the rear of the bolt. Not that there was anything negative about it, as plastic on metal frequently gives a low-friction feeling which I do like. Bolt lift was not bad, but did take a little bit of getting used to. Not bad, obviously not as good as some of the other rifle actions frequently used today.

Among the features that seal the deal for me is the trigger pull. While I don’t consider myself a trigger snob, I do enjoy a perfect trigger whenever I can. Ruger’s trigger on the RPR was a good one, clean and without the abrasive skipping often felt on triggers of lower tiered firearms. I’ve never been a big fan of blade safeties. When they first came out many years ago, the first thing I did was figure out how to remove them. That being said I wasn’t so hateful of this one to look for a way to remove it.

Shop ruger Precision Rifles here

The main safety was in the same place your traditional AR style rifle safety goes, which made it very convenient and familiar to use. It wouldn’t hurt my feelings if they put it on both sides like AR’s often do, but certainly not a deal breaker.

This RPR runs on 308 sized P-Mags, and it came with a ten-round magazine. After some range time I would try the twenty-round ones as well, just in case you ever needed to do some long strings of fire.
Including a folding buttstock of the rifle made it much shorter for transportation, and doubled as a quick way to remove the bolt for inspection, lube, or cleaning. Up front we had the hammer-forged twenty-four inch barrel inside a free-floated handguard. Cut into the muzzle of the barrel are 5/8-24 threads. Which was great because I planned on mounting some stuff there.

The handguard on my particular rifle uses KeyMod for accessory attachment. But they are also available in the more modern and useful M-Lok. I secured the Atlas bipod to the pic rail underneath, and then I was ready to mount up a riflescope. Continue Reading Here…

A good rifle deserves an even better scope, like the US Optics FDN17x

FIRST SHOTS

Running the bolt forward on a cartridge felt smooth and controlled. I could often feel the slightest bind as the bolt closed the last few degrees. Almost like the extractor was having trouble snapping over the cartridge rims. As I brought the reticle to rest on my point of aim, I took up the slack in the trigger and gave it a steady press.

Repeating the process another four times and made a nice little vertically strung group. I have noticed this tendency during this cold time of year. Particularly when both rifle and ammo are below freezing temperatures.

As the bore warms and each round is chambered into a progressively warmer chamber. Velocity increases slightly and brings the point of impact up a touch with each shot. Horizontal dispersion was minimal, and the overall group size was just under an inch.

That’s not too shabby using what most would consider plinking ammo, and the results were even better when shooting 140-grain match ammunition. I pushed the RPR out to half a mile to see how it performed. As I suspected, it was easy impacts. Recoil on the rifle wasn’t terrible, allowing me to spot my impacts at those extended ranges.

federal 6.5 creedmoor ammunition american eagle
Even the inexpensive American Eagle 120 grain ammo shot well

Suppressed

Shooting this rifle go without seeing how it does with a suppressor wasn’t an option to me. To that end, I pulled out my Yankee Hill Machine Nitro N20 suppressor. During my range time I noticed only a small change in point of impact. Likely due to the light weight of the Nitro.

It was beautiful to shoot in the open country of the mountains and listen to the long journey of the bullets. They hissed through the sky before they thumped into the target. I think the RPR deserves a good suppressor, it makes a great little rifle even better.

POSSIBLE DOWNSIDES?

At first, I wondered why they made it a 24-inch barrel versus a 26-inch barrel. After running around with this thing, I understand why.  If I had the ability to order the RPR from the factory, I would have done so with a shorter barrel length that was more like 20 inches.

Ruger Precision rifle 6.5 Creedmoor
rifle details; notice QD sling cup behind the grip, and locking mechanism for folding stock just above it

Adding a folding stock is great for reducing the length of the rifle, at least when you are trying to transport it. But another one of my complaints has to do with the folding mechanism, mainly that it only locks in the shooting position.

While it’s not a deal-breaker for me,  it would be really easy to get something pinched in the pivot point. Especially when the stock inevitably comes swinging back as you try and maneuver it.

The magazine release was also a touch tough for my taste. It was easy to falsely engage the magazine on this rifle to where it looked like it was in. Making you think it was secure, but was not really secured.

Ruger’s magazine release also seemed to require a touch more force than I would expect for such a simple and common motion. This is likely something that can be adjusted or corrected by the user, so don’t worry too much about it.

MY CONCLUSION

As I suspected, the Ruger Precision Rifle 6.5 Creedmoor is just what I thought it would be – a great-shooting production rifle with an entry-level price tag but professional results. Sure, it’s not as nice as the custom precision rifles out there.

And you can feel that it has been mass-produced. But nonetheless, the rifle performs very well in its capacity. It gives the user accurate shots, a familiar manual of arms, and pleasing aesthetics.

Above and beyond that, there are countless ways to customize and improve the rifle with excellent aftermarket support. I have some nice rifles in my safe. I wouldn’t trade any of them for a Ruger RPR, but I wouldn’t mind having a couple RPRs in the safe to give them company.

-CBM

Ruger RPR 6.5
The Atlas bipod makes an excellent addition to the rifle

Building Your Dream Rifle

Preface

I receive questions almost daily from people who are in the process of putting a custom rifle together, its usually a question about chambers, barrel lengths, different manufacturers or some other specific part. Many times during the discussion, it comes out that maybe one or more of the options aren’t ideal for the intended purpose of the rifle, and that inevitably ends up causing a change in strategy. In the interest of not wasting valuable time, money and other resources, I figured I would put down a good process so that anyone who is interested in Building Your Dream Rifle can follow along in the hopes of avoiding that waste. And perhaps the details that follow can get you on the range sooner.

tikka 25 creedmoor
this little Tikka T3 is a custom I put together years ago

Getting Started

Whether you are rebuilding a rifle or starting from scratch, there are a few very important criteria that should be considered every step of the way. There may be others, but the main two I will focus on, and the rest are based upon are; the intended purpose of the rifle, and the budget you have to spend on it.

Purpose

The intended purpose of the rifle is very important, it will dictate many of the rifles aspects such as caliber, weight, quality, etc. If your intended purpose is a hunting rifle, then a twenty-plus pound rifle would not be a good starting point. Just as if you are building a match rifle for PRS style competition, a 338 Lapua Magnum may not be the ideal cartridge to choose. So it is very important to evaluate what you intend to do with this rifle when you’re done with it. Many people start with the idea of a do-all rifle when building a custom, in my experience, custom rifles are an addiction and if you build one, you will likely follow it with more. So don’t be too afraid to get fairly specific with your purpose.

25 creedmoor, 6 ARC, Howa Mini
my custom Tikka T3 behind a factory Howa Mini 6 ARC

Budget

The budget you have to spend on a rifle has just as much influence as the intended purpose because many of us are not rich, and the dollars we have available to spend are limited. You should make sure that your choices are made with that in mind. If you blow your entire budget on a receiver and barrel, you may not have enough left to spend on a good scope. With so many great options available to you today, there are components that will meet most every custom rifle build budget.

Moving forward, here is the order in which I typically choose my components. Afterward, I will discuss them individually:

  • Intended Purpose
  • Project Budget
  • Accuracy Required
  • Distances intended to shoot
  • Weight Limit
  • Bore Diameter
  • Bullet intended to shoot
  • Velocity required
  • Barrel Twist
  • Cartridge Selection
  • Barrel Length
  • Receiver Selection
  • Barrel selection
  • Capacity needed (magazine)
  • Chassis or Stock Choice
  • Trigger
  • Scope & Mounts
  • Accessories

    Selecting a Bullet

    The distances you intend to shoot are very important. If it is a match gun for thousand-yard benchrest, then you probably want to shoot something 6mm or larger. If you plan on dangerous game in Africa, then you probably want something .375 or bigger. It’s pretty easy to decide on this subject, if in doubt, just look at what most others are using to do the same. The important part is to match the distance and bore-size to the job at hand. Hitting targets at 1000 yards don’t require huge amounts of energy, whereas hitting a buffalo at 100 yards does. And it’s especially important if you plan on shooting animals at any significant distance, you need to know what kind of energy and accuracy you need before moving to the bullet.

    bullets
    Picking the right bullet for your purpose is important

    Selecting a bullet you’ll notice is almost at the top of the list, which may seem like putting the cart before the horse but you’ll soon see why. The only reason we shoot rifles is that we want to hit what we’re aiming at, accuracy then must be one of our top priorities. So once you figure out your available budget, and what you plan to do with the rifle, you should have a pretty good idea about the level of accuracy that will be necessary. Most of the time we want as good of accuracy as can possibly be achieved, so it goes almost without saying that we want a precise shooting rifle capable of sub-MOA (minute of angle) accuracy, and preferably better than half MOA.

Ballistics and Coefficients

So the next step is choosing the bullet you intend on shooting. The reason this is so important and at the beginning of the list is because so much of the rest depends on it. You should pick a bullet that meets the criteria of your budget and purpose, personally, I try and use the most inexpensive and readily available bullet I can, but one that is heavy for caliber, and has the highest Ballistic Coefficient (BC) as possible. For example;
If I am planning on shooting a 6.5 for competition, I would probably find something that is 140 grains or more, preferably with a high .290 or better BC, and available readily and in bulk packages to save money. Just how high a BC is up to you, there are plenty of inexpensive options like the Barnes Bullets Match Burner, or you could spend quite a bit more on something like a Berger Bullets 156 EOL.

Barnes varmint bullets
Another example; If you are building a hunting rifle and only anticipate shots inside of two hundred yards on whitetail sized game, then you probably don’t need to spend a fortune on specialty or high BC bullets. A simple and inexpensive soft pointed bullet would do the trick just fine. There are pros and cons to either, so pick a bullet that fits your budget and availability, I say bullet but it could be multiple bullets if you must. I prefer and suggest to others to stick to one bullet, if you don’t know why, then you should read this when your done.

Twist Rate

Once you have decided on a bullet or perhaps bullets, then you know what kind of barrel twist is required by that manufacturer in order to shoot it well. So mark that down on your build list right next to the bullet. I like fast twist barrels, they are better for shooting the typically heavier bullets that have the higher BC’s. And with technology going the way it is, there are more and longer and heavier bullets headed our way. So favoring a faster twist may leave the door open to shooting better bullets in the future. I have at least one barrel that is an 8.5 twist and I wish it was an 8 or a 7.5, but that’s life in the fast lane.

Energy

If your goal is to hunt big game animals at long range, then you will definitely need as much energy as possible, that can be achieved by higher velocity. A 308 and 300WM can both shoot a 180-grain bullet, but the 300WM can shoot it much faster and therefore carry more energy. The 300WM then would be the better choice of the two for long-range hunting. That is the simple way to choose a cartridge, you can make it as simple or as hard as you want. Just keep in mind the two governing factors we spoke of at the top, what fits both my purpose and budget. It might be a 300WM or it might be a 30 Nosler or PRC, one has more energy, one is cheaper, pick your poison.

remington 700 custom rifle

Now that you know your bullet and cartridge combination, you need to decide on a barrel length. How much barrel do you need to get your selected bullet up to speed for the job you’ve tasked it to? Bigger cases with lots of powder usually need a long barrel to burn it all, and that’s what gives those big cartridges their speed. So if you chose the 300WM with a twenty-two-inch barrel, you’ll be slower than had you chosen a twenty-six inch. With as much data as there is available today, this is a very simple calculation to find. Just figure what muzzle velocity you need to stay above the minimum required velocity and energy at the distance you have determined at the outset of the project. Today’s ballistic solvers are an extremely valuable tool for doing this, there are many available, I prefer Trasol.
There are many fantastic barrel manufacturers, some cost more than others, and some have features and services others don’t. You may want a less expensive button-rifled barrel, or perhaps a cut rifle barrel. You may want flutes cut in the barrel to reduce weight, or maybe a carbon fiber wrapped barrel. Each has its pros and cons again, look into as many options as you can, so you don’t regret it after your rifle is done.

carbon fiber barrel
this Proof Research barrel has worked out great for my hunting rifle

Receiver

With barrel details, and the cartridge now written down on your build sheet, its time to pick a receiver to house all this excitement. If you are building a short action cartridge like a 6.5 Creedmoor, then you can pick from a plethora of high-quality short action receivers. Whether it’s a simple Remington 700, or something real fancy like the Badger Ordnance 2013 Action, it once again comes back to your budget and purpose. There are too many manufacturers to list nowadays, making short, long, and XL actions. You can get them in the very common Remington 700 footprint, to use the huge aftermarket support of that pattern, or try one of the many others. Just make sure that when choosing a receiver, you make sure your components are compatible (chassis/stock, bottom metal, etc.).
Keep in mind that some of these receiver options come with built-in canted scope bases, or available scope bases with various cant options. Do yourself a favor and research those options before buying to make sure it matches your intended purpose.bergara b14 crest carbon

Magazine Options

The purpose of your rifle will also determine what kind of round capacity you will need. Whether its three, or twelve, you can feed your rifle through a magazine. Most hunting rifles use a blind box mag, and if that meets your requirements then you needn’t look any further. But if you want a larger capacity, then you may consider a detachable box magazine. If your not sure, you can always choose a DBM setup, and run five round mags, ten rounders, or whatever fits your needs. Just keep in mind that additional weight for your end goal.

Another big choice you will need to decide on is what kind of chassis or stock you plan on using. But since you now know what action, barrel & contour, magazine or DBM, and of course what the purpose of the rifle is, it just comes down to choice and what you can fit in the budget. Keep in mind features between chassis, such as construction and accessories. A carbon fiber stock is much lighter than a fiberglass stock, but maybe you want a heavy chassis instead, with adjustable weights on it.

Trigger Selection

Almost any rifle receiver worth having has a good trigger available. Again, do your research and see what you can get that fits your taste, your rifle, and your budget. I am a very big fan of Trigger Tech triggers, but there are many others as well. One thing on triggers, make dang sure you are getting the right model for your build, and ensure safeties, bolt stops, and releases are compatible before you order one. The last thing you want is to get everything put together only to find out your bolt release won’t work or some damn thing.

The Correct Scope and Mount

The scope and mounting system are incredibly important, so don’t skimp on them. It can be very hard to know what height scope rings to get, or what base to mount them to if you don’t have the components in hands. Many of us order these parts online, so you cant really dry fit them until they arrive. Unfortunately, the best you can do is estimate from your best measurements, and see how it turns out.
Your scope and scope base choice are critically dependent on your ballistic data (determined by numbers we figured out already above). You may need a 20, 30, or 40 MOA scope base in order to reach your distance goal, particularly if the scope you choose has inadequate internal travel. Whereas if you are building a short-range rifle or a super flat shooting rifle, you may not need any additional cant.
Your scope magnification depends greatly on preference and your eyes. But choose one that will allow you to see targets within your intended range, and has the range of magnification you will need. Optics are very subjective because we all have different eyes, so you cant always take others’ opinions for granted, not even mine. Ideally, you should try out your prospective scopes beforehand, but if that isn’t an option, then you may just have to base your choice on other people’s reviews. Read all my scope reviews here if you’d like some opinions.

Accessories

The last thing to cover is accessories, things like bipods, slings, suppressors etc. Now that you have all of your other bases covered, it should be pretty easy to pick out accessories. A stockpack perhaps that fits the stock you already selected or a support bag that attaches directly to the chassis you picked out. With all the minutia of your build nailed down, you can select all the accessories that will fit it.Seekins Havak HIT

Conclusion

Hopefully this has been a helpful walkthrough on how to put your dream rifle together, these steps can be followed or applied to additional build aspects. If you’ve done it right, you should basically have a build sheet with everything you need to acquire. The end goal is to have a rifle you are pleased with, functions as designed, and brings a smile to your face. But don’t be too satisfied with it, as it won’t be long till the build bug bites you again and the whole process starts over again. And when it does, come back and read this again.

-CBM